이번 시간에는 안드로이드 스튜디오에서 인트로 화면을 만들어 볼 텐데요,
앱을 시작할 때 몇 초간 인트로 화면이 나오고 이후 메인화면으로 넘어가는 것을 실습해 보겠습니다.
그럼, 안드로이드 스튜디오에서 New Project 》 Empty Views Activity를 선택해 주세요.

프로젝트가 생성되었으면,
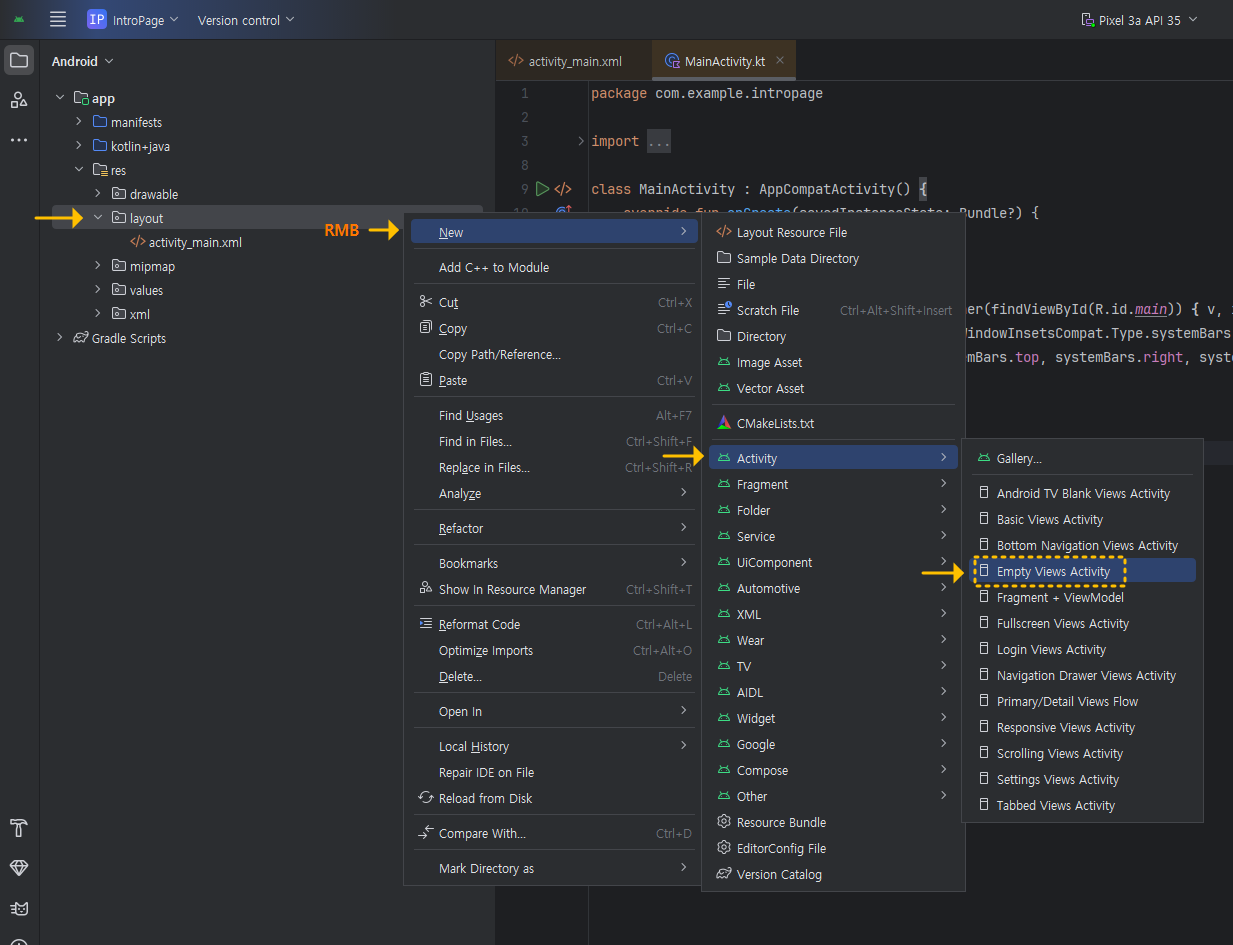
프로젝트 탐색창의 res 》 layout 폴더를 RMB(마우스 우 클릭)하여 New 》 Activity 》 Empty Views Activity를 추가해 주세요. (아래 참고)
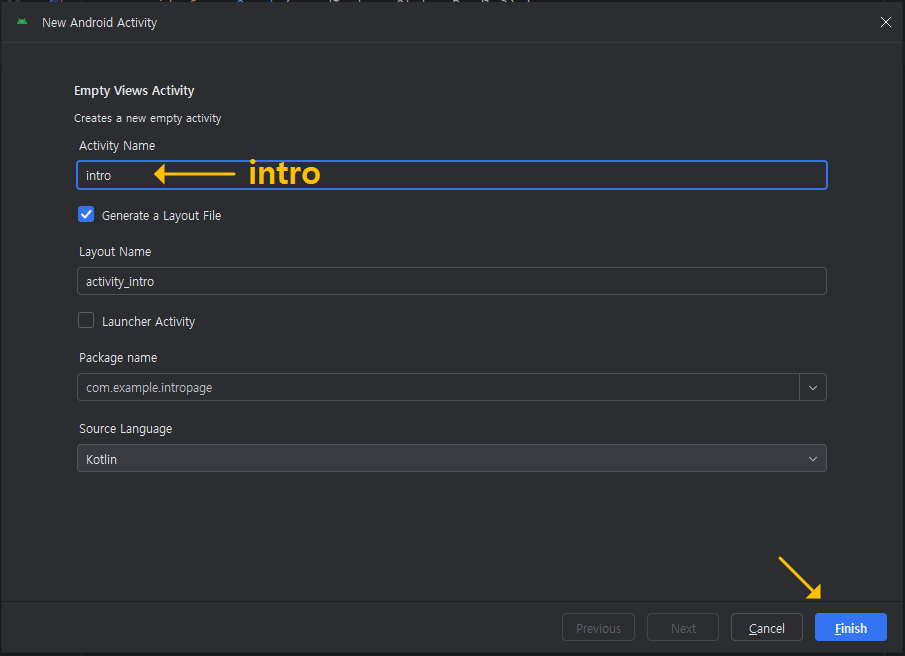
타이틀 제목은 intro로 할게요.
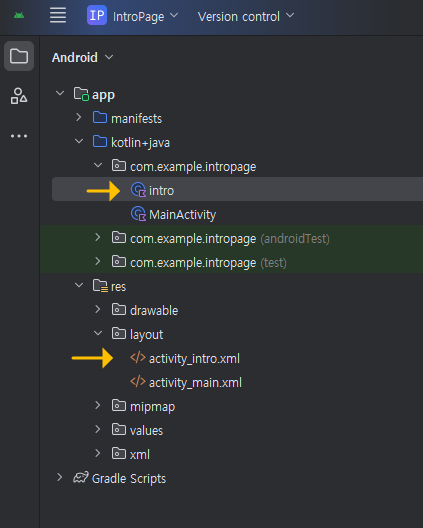
그럼, 아래처럼 인트로 xml 파일과 코틀린 kt (자바는 js) 파일이 함께 만들어진 것을 볼 수 있습니다. (activity_intro.xml & intro.kt )
그럼, 인트로 화면과 메인 화면을 구분하기 위해, 인트로 화면의 배경색을 기본 흰색에서 적당한 색으로 바꾸고, intro 표시도 해볼게요.
activity_intro.xml의 코드내용을 아래와 같이 작성해 보세요.
<?xml version="1.0" encoding="utf-8"?>
<androidx.constraintlayout.widget.ConstraintLayout xmlns:android="http://schemas.android.com/apk/res/android"
xmlns:app="http://schemas.android.com/apk/res-auto"
xmlns:tools="http://schemas.android.com/tools"
android:id="@+id/main"
android:layout_width="match_parent"
android:layout_height="match_parent"
android:background="#D1DB6E"
tools:context=".intro">
<TextView
android:id="@+id/textView"
android:layout_width="189dp"
android:layout_height="107dp"
android:gravity="center"
android:singleLine="false"
android:text="안녕하세요~!\n인트로 화면입니다.\n 5초 뒤에 사라집니다"
android:textColor="#F44336"
android:textSize="20dp"
android:textStyle="bold"
app:layout_constraintBottom_toBottomOf="parent"
app:layout_constraintEnd_toEndOf="parent"
app:layout_constraintStart_toStartOf="parent"
app:layout_constraintTop_toTopOf="parent" />
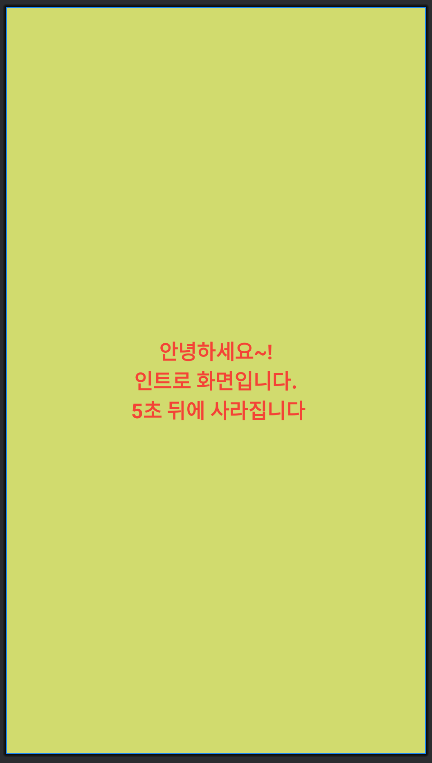
</androidx.constraintlayout.widget.ConstraintLayout>그러면, 아래와 같이 보일 거예요.
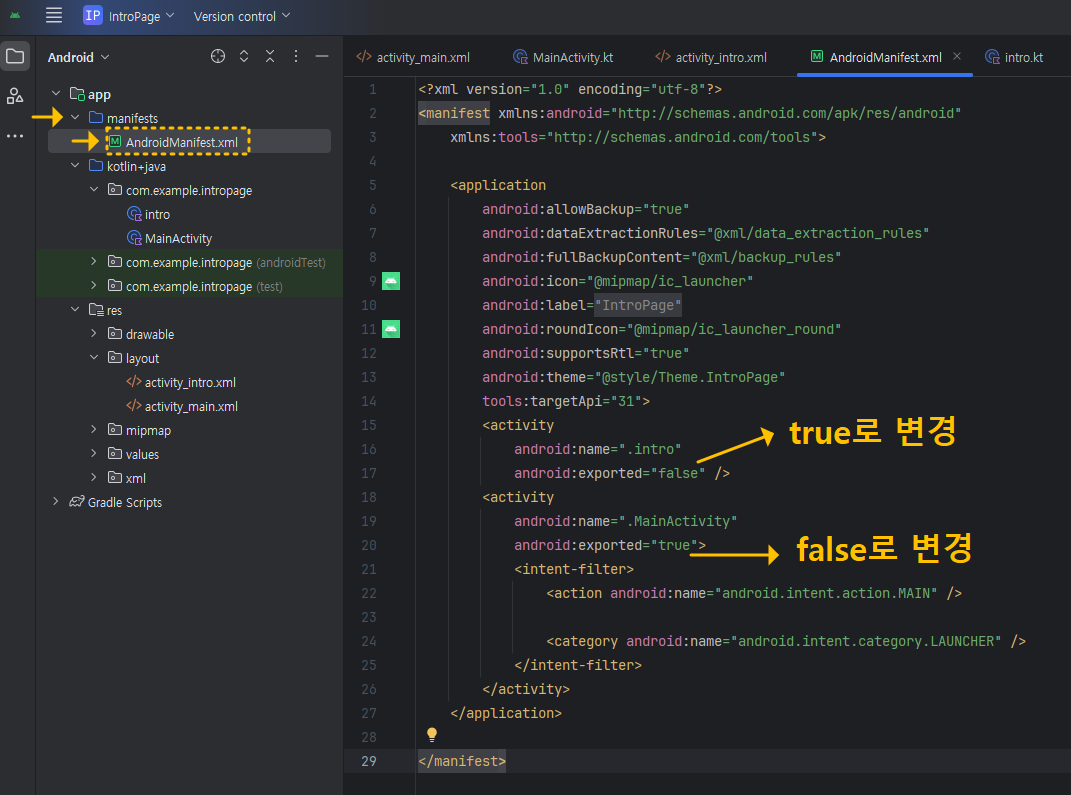
그리고, 앱을 실행하면 제일 처음 뜨는 화면이 있는데, 기본적으로는 MainActivity로 지정되어 있어서, activity_main.xml 파일이 로드되어 화면에 보이게 되는데요, 우리는 지금 activity_intro.xml 파일을 먼저 띄워 주는 것으로 바꾸어야 하기 때문에, 아래 이미지를 참고해서 변경해 보세요. app 》 manifests 》 AndroidMainfest.xml 파일을 열어서
→ activity name이 .intro로 되어 있는 부분의 android:exported="false" 부분을 true로 변경하고 ,
→ activity name이 .MainActivity로 되어 있는 부분의 android:exported="true" 부분을 false로 변경하면 됩니다.
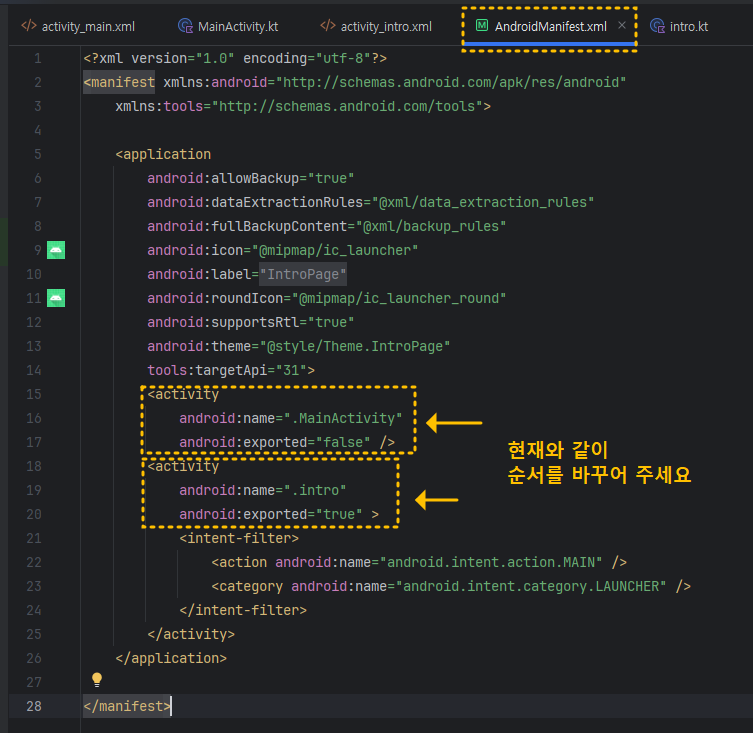
그리고 .intro 부분과 .MainActivity 부분의 위치를 바꾸어 주세요. (단, 복붙해서 바꿀 때, /> 와 > 표시가 잘못되지 않도록 주의하세요)
아래는 변경한 모습입니다.
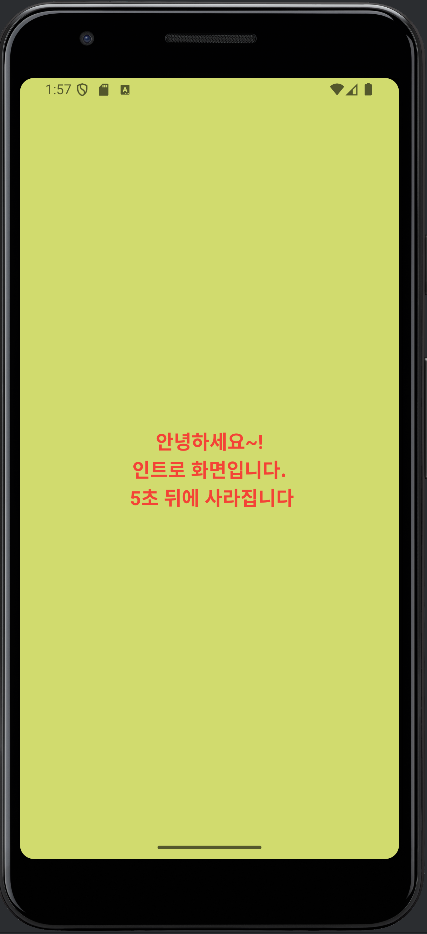
여기까지 해놓고 실행시켜 보면 인트로 화면이 먼저 뜨는 것을 볼 수 있습니다.
이제, 인트로 화면이 5초 뒤에 사라지도록 해볼 텐데요, 아래처럼 intro.kt에 코드를 작성해 주세요.
class intro : AppCompatActivity() {
    override fun onCreate(savedInstanceState: Bundle?) {
        super.onCreate(savedInstanceState)
        setContentView(R.layout.activity_intro)

        Handler(Looper.getMainLooper()).postDelayed({
            val intent = Intent(this@intro, MainActivity::class.java)
            startActivity(intent)
            finish()
        }, 5000)
    }
}
위 코드에서 마지막에 보이는 5000 수치를 변경하면 시간을 조절할 수 있습니다. (1000 → 1초)
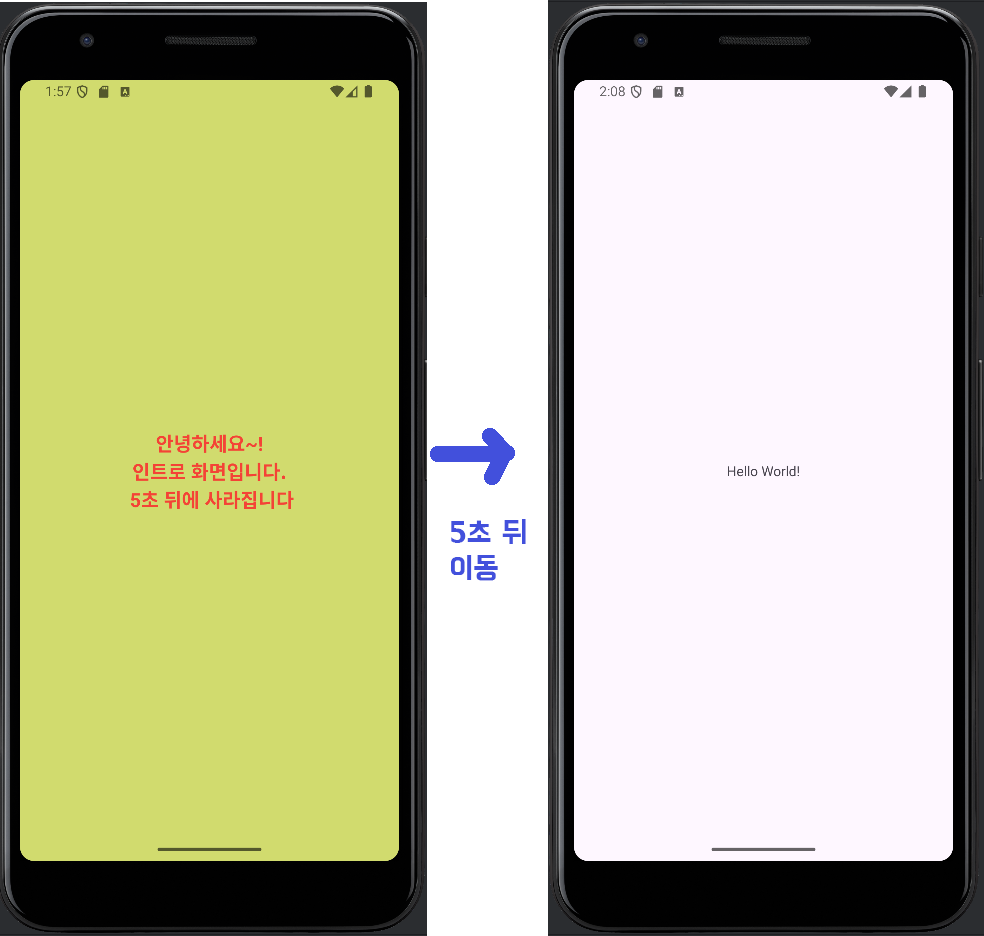
Handler 클래스의 postDelayed 메서드를 이용해서 MainActivity로 이동하도록 하였는데요, 만약, Handler 글자가 빨간색으로 되어 에러 표시가 난다면, 마우스를 Handler 글자 위에 올려놓은 상태에서 Alt+Enter를 눌러 해당 클래스를 import 하여 추가해 주면 됩니다.
import android.os.Handler그리고 실행시켜 보면 아래와 같이 화면 전환 되는 것을 볼 수 있습니다.
아래에 전체 코드를 다시 한번 올려놓을 게요.
[ intro.kt ]
package com.example.intropage

import android.content.Intent
import android.os.Bundle
import android.os.Handler
import android.os.Looper
import androidx.activity.enableEdgeToEdge
import androidx.appcompat.app.AppCompatActivity
import androidx.core.view.ViewCompat
import androidx.core.view.WindowInsetsCompat

class intro : AppCompatActivity() {
    override fun onCreate(savedInstanceState: Bundle?) {
        super.onCreate(savedInstanceState)
        setContentView(R.layout.activity_intro)

        Handler(Looper.getMainLooper()).postDelayed({
            val intent = Intent(this@intro, MainActivity::class.java)
            startActivity(intent)
            finish()
        }, 5000)
    }
}
[ AndroidManifest.xml ]
<?xml version="1.0" encoding="utf-8"?>
<manifest xmlns:android="http://schemas.android.com/apk/res/android"
    xmlns:tools="http://schemas.android.com/tools">

    <application
        android:allowBackup="true"
        android:dataExtractionRules="@xml/data_extraction_rules"
        android:fullBackupContent="@xml/backup_rules"
        android:icon="@mipmap/ic_launcher"
        android:label="@string/app_name"
        android:roundIcon="@mipmap/ic_launcher_round"
        android:supportsRtl="true"
        android:theme="@style/Theme.IntroPage"
        tools:targetApi="31">
        <activity
            android:name=".MainActivity"
            android:exported="false" />
        <activity
            android:name=".intro"
            android:exported="true" >
            <intent-filter>
                <action android:name="android.intent.action.MAIN" />
                <category android:name="android.intent.category.LAUNCHER" />
            </intent-filter>
        </activity>
    </application>

</manifest>
[ activity_intro.xml ]
<?xml version="1.0" encoding="utf-8"?>
<androidx.constraintlayout.widget.ConstraintLayout xmlns:android="http://schemas.android.com/apk/res/android"
    xmlns:app="http://schemas.android.com/apk/res-auto"
    xmlns:tools="http://schemas.android.com/tools"
    android:id="@+id/main"
    android:layout_width="match_parent"
    android:layout_height="match_parent"
    android:background="#D1DB6E"
    tools:context=".intro">

    <TextView
        android:id="@+id/textView"
        android:layout_width="189dp"
        android:layout_height="107dp"
        android:gravity="center"
        android:singleLine="false"
        android:text="안녕하세요~!\n인트로 화면입니다.\n 5초 뒤에 사라집니다"
        android:textColor="#F44336"
        android:textSize="20dp"
        android:textStyle="bold"
        app:layout_constraintBottom_toBottomOf="parent"
        app:layout_constraintEnd_toEndOf="parent"
        app:layout_constraintStart_toStartOf="parent"
        app:layout_constraintTop_toTopOf="parent" />

</androidx.constraintlayout.widget.ConstraintLayout>
감사합니다. 좋은 하루 보내세요~
'App개발 > Android_Studio' 카테고리의 다른 글
| 【AndroidStudio】 gradle 관련 에러 해결하기! (2) | 2024.09.10 |
|---|---|
| 【AndroidStudio】 기본 버튼 스타일을 다양하게 바꾸어 보자~! (0) | 2024.09.09 |
| [Android Studio] Fragment - 프래그먼트 사용법 (코틀린-kotlin) (0) | 2024.09.06 |
| [Android Studio] VIew Binding - 뷰 바인딩으로 바꾸기 (코틀린) (0) | 2024.09.06 |
| 【트러블슈팅】 개발프로그램에서 스마트폰과 연결이 안될 때! (0) | 2024.08.12 |